

Measuring Suggestions:
We would like to offer some suggestions to help you determine the size of custom made curtains you need. Keep in mind that the look of the actual made to order curtain is based solely on personal preference and where you place your rods, not necessarily the width of your window. Some people choose to place their rods on the window casing, others place their rods just outside the window casing and still others will extend their rods several inches on both sides of the casing and others will mount their curtain rod near the ceiling. This information is to give you general guidelines.
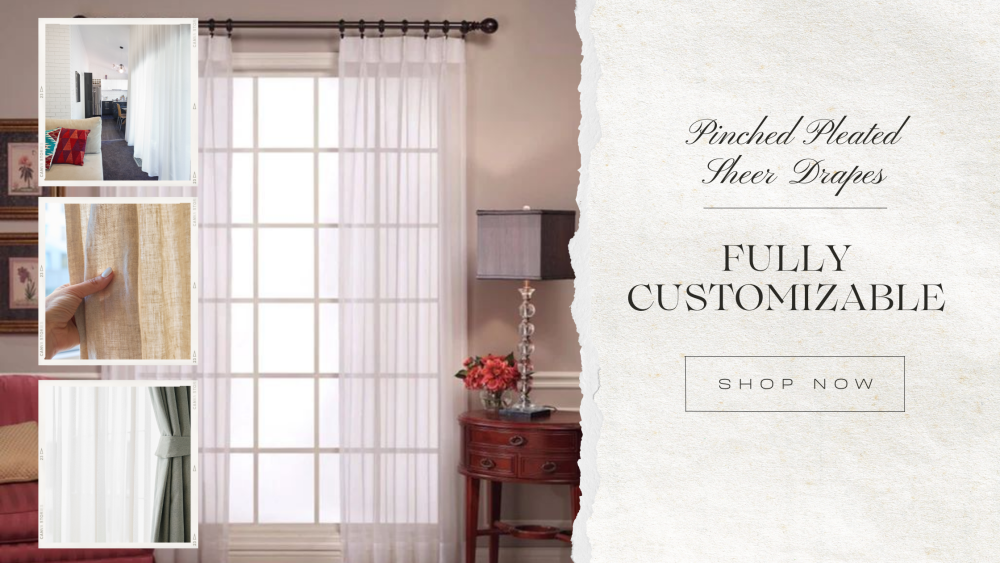
Stack-Back Calculations for Pinch Pleated Drapes:
| Window Opening | Stack-back | Rod Width |
|---|---|---|
| 24 | 21 | 45 |
| 30 | 23 | 53 |
| 36 | 25 | 61 |
| 42 | 26 | 68 |
| 48 | 29 | 77 |
| 54 | 30 | 84 |
| 60 | 31 | 91 |
| 66 | 32 | 98 |
| 72 | 34 | 106 |
| 78 | 36 | 114 |
| 84 | 37 | 121 |
| 90 | 38 | 127 |
| 96 | 39 | 135 |
***The numbers above are based on standard two way draw (drape panel on each side of window).If you are having a one way draw (drape panel pulls to only one side of window) then deduct 7 from the above stack-back and rod width figures.
Suggestions for rod placement:
When determining your length or width for your custom curtains, there are a couple of things to decide on.
1. First, where are you going to mount your rods? Today’s trend is to mount closer to the ceiling to give the effect of giving height to the room. So this must be decided prior to determining your curtain length. We suggest anywhere from 4” above window or window trim all the way up to the ceiling or below any crown molding.
2. Second, how wide are you going to mount your rods? Are you just going to place the bracket right outside of the framing? We suggest you mount the rod so that when the curtains are open, only 2-3” of the curtain covers the window on each side. This will make the window appear wider and will give your room much more natural lighting.
How to Order for a Rod Pocket Panel:
- Rod Pocket Panels can be fabricated with various different sizes of rod pockets and headers. A header or heading is the part of the drapery panel that ruffles above the curtain rod right above the rod pocket
- You will need to know what size of rod you are using to order the correct size. Typically a 3” pocket will fit on decorative poles of 1 ¼” to 1 ½” or on a 2 ½” continental flat rod. A 1 ½” rod pocket will fit decorative poles up to ¾” in diameter or on a standard white plain curtain rod.
- Fullness is based on personal preference and on how you plan on hanging the curtains, do you want them to meet in the middle of the rod and pull them back? Or simply hang as decorative side panels? Typically when pulling curtains back you will want double fullness.
- Our Rod Pocket panels are measured from the top of the rod pocket, we do not add the header into the length you need as the header is above the rod. If you order a 90” panel with a 2” header, your finished product will be 92” in total length.
How to Order for a Flat Drapery Panel:
- A Flat Drapery panel is very similar to a rod pocket panel, except it has no rod pocket or header.
- The Flat Drapery panel is a great style to use when you need a functioning curtain (one that opens and closes) and your window does not require more than one center support bracket.
- This style of curtain is to be hung on decorative poles that use rings with clips, so that you essentially clip the top of the panel when hanging.
- You will need to measure from the clip on your ring down to where you want the panel to stop to order the correct length.
- For a standard window, you will need two panels.
![]()
How to Order Back Tab/Hidden Tab Curtain Panels:
- Back Tabbed or Hidden Tab curtains are fabricated tabs in the back of the panel instead of at the top of the panel. These tabs will accommodate a decorative curtain rod up to 1 3/4" in diameter.
- You will need to measure from the top of your curtain rod, down to where you would like the panel to end. If you are using a thick diameter pole, you may want to add 1” for take up (the amount the pole will cause the curtain to inch up at the bottom).
- Panels are measured from the top to the bottom.
- For a standard window, you will need two panels.
- We suggest the width of both panels to be at least twice the width of your rod for wider windows.
How to Order Grommet Top Curtains:
- Grommet Top curtains are fabricated with a metal grommet that can accommodate a curtain rod up to 1 3/8" in diameter. This allows the grommet top curtain to work nicely with most decorative curtain rods. A decorative rod is used since the curtain rod will be visible.
- Grommet curtain panels work well for functionality on windows that do not require more than one center support bracket.
- Grommet panels should be a minimum of 1 ½ times fullness on your window. The fuller the grommet panel is the more grommets it will have and thus more folds.
- If you want a custom look, we do not suggest putting more than two grommet panels on a window as it will be obvious where the panels end and start, use wider panels instead.
- We make grommet top panels any width or length you need.
- For a standard width window, you will need two panels.
How to Order for Tab Top Curtains:
- Tab Top Panels are fabricated with a 3” tab at the top of the panel. These tabs will accommodate decorative rod up to 1 1/4" in diameter. A decorative rod is used since the curtain rod will be visible.
- The length of the Tab Top curtain is measured from the top of the tab down to the bottom of the panel.
- For a standard window, you will need two panels.
How to Order for Pleated Curtains:
- We offer various styles of pleated draperies. Pleated curtains can be used as decorative stationary panels or can be used as functional draperies. Either use, we will need to know how much rod area you want to cover since the fullness of the drape is built into the pleating and extra width calculation on your part is not necessary.
- If using as a functional curtain, you will need to first determine where you will be mounting your rod, if you do not currently have one up. We will need the width of the rod from bracket to bracket and the depth of the rods’ return in order to pleat your curtains to fit.
- Pinch pleated curtains can be hung using a traverse curtain rod with drapery pins or a decorative pole using rings with eyelets that also require drapery pins or on a decorative curtain rod using rings with clips attached (less formal).
Pinch pleat curtains are can be fabricated any width or length you need to accommodate all windows.
Ordering for Sheer Curtains
- For sheer curtains use double or even triple the width of your window area depending on how much privacy, light control, or fullness you want at your window.
- For Pinch Pleated sheers, you will order by the width of your curtain rod and the depth of your curtain rod returns. Fullness is sewn into the product automatically, you do not need to add extra width.
How to Measure for Rod Mounted Valances: View video for Gathered and Flat Style valances
Gathered Valance:
- Fullness is more subjective and a matter of personal preference. Here are a couple of suggestions:
- Use approximately 1 ½ - 2 ½ times the fullness in fabric to rod width. For thicker fabrics you can stay on the low side of 1 ½ - 2 times and for thinner fabrics 2 ½ to 3 times your window width.
- If you want to see more of the pattern of the fabric, use less fullness.
- Gathered valances come standard in either a 1 ½” or 3” rod pocket. Some of our rod sleeves come in a 4 ½” pocket. We can normally make variations if need a different rod pocket size than what the product states.
Flat Style Valances:
· Set sized flat style valances:
- You will want to measure the front of the rod and the sides (returns) of your rod, add up the numbers and order the size valance closest to this number. ex. Rod is 48” wide and the sides of the rod (returns) are each 4” = 48+4+4=56”. For our set sized flat valances you will need to order the next largest size we offer over 56”.
Made to Measure Flat Style Valances:
- We offer some flat valances any width you need. You will need to measure the same as above, the width of the rod plus each side of the rod. At this point we suggest adding 1/2” to the number. It is better to have a bit more valance width then to come up a little short when the valance is to lay flat.
- If using a decorative pole, you will want to measure from bracket to bracket as you do not have any rod returns to cover.
How to Measure for Board Mounted Valances: Watch video on how to measure for board mounted valances
- Measure the width you would like to cover. This is typically the width of the window including any molding around the window. We suggest adding 2”-4” to your measurement (if wall space allows).
- Keep in mind, if you will be layering the valance over blinds or drapes, as you will need to make sure you add enough width to go past any rods etc.
- Select the projection of the board, either 3 ½” or 5 ½”. Most will use the standard 3 ½” unless they have wide blinds or draperies under the valance. The projection of the board is the same as the depth of the board. You will need a wider depth to mount the board over rods etc.
How to Measure for Upholstered and Soft Cornices:
- Measure the width you would like to cover. This is typically the width of the window including any molding around the window. You need to add a minimum of 2” to this measurement to compensate for the wooden side legs on our cornices as they reduce the width of the inside measurement.
- Keep in mind, if you will be layering the cornice over blinds or drapes, you will need to make sure you add enough width to go past any rods etc. (this will be in addition to the 2” above).
- Select the projection of the board, either 3 ½” or 5 ½”. Most will use the standard 3 ½” unless they have wide blinds or draperies under the cornice. The projection of the board is the same as the depth of the board. You will need a wider depth to mount the cornice over rods etc.
How to Measure for a Throw Scarf or Fishtail Swag:
- First we suggest mounting your hardware approximately 2”-3” above and out from your window.
- Determine how far down the window you want the sides to hang and multiply it by 2 as you have 2 sides.
- Then add the width of the window to the number above. Then add 6” – 12” for each space in between two holders.
- Otherwise we suggest taking a good piece of heavy duty string and run it the same as you would your scarf along your holders and then measure your string, that will be the same size you need to order.